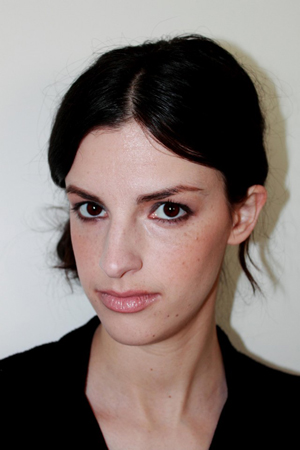
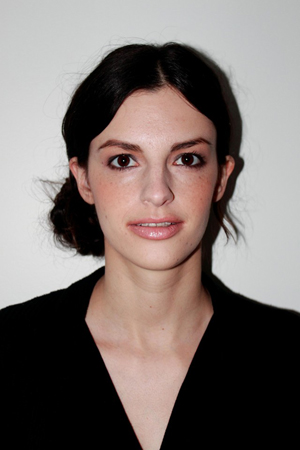
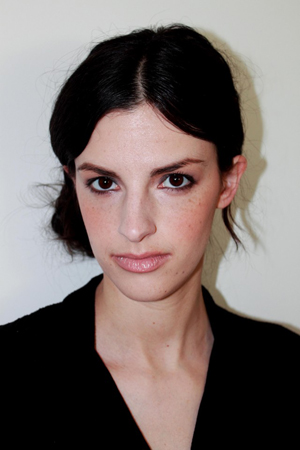
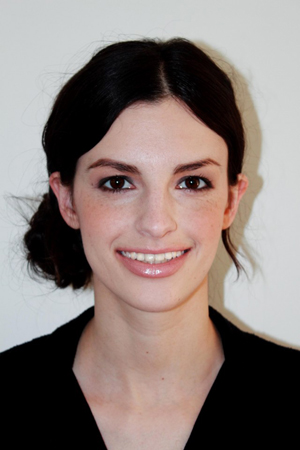
Beauty Trend Part 4: Tangerine and Tousled Waves
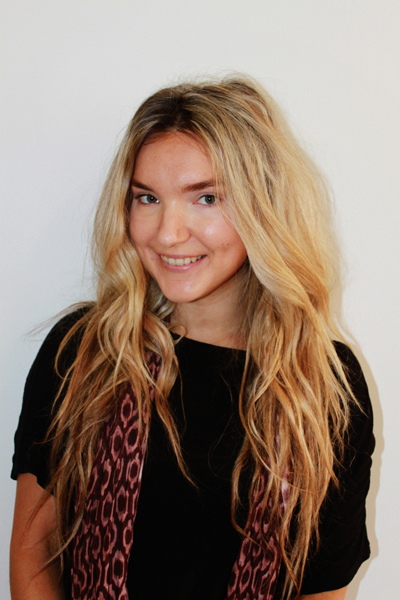
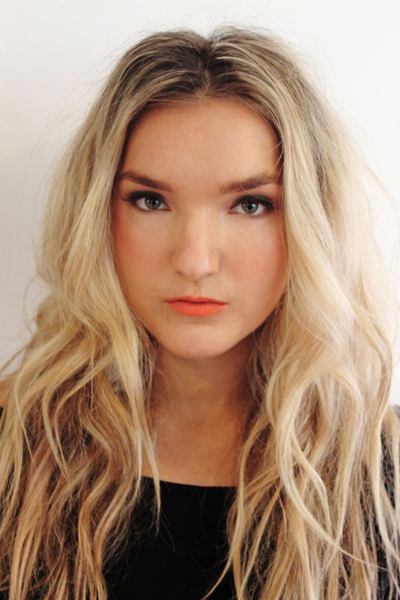
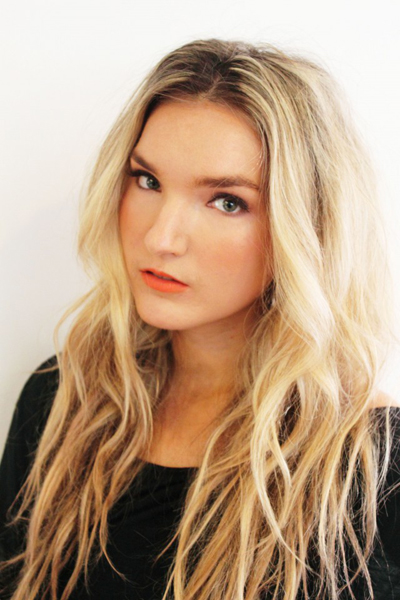
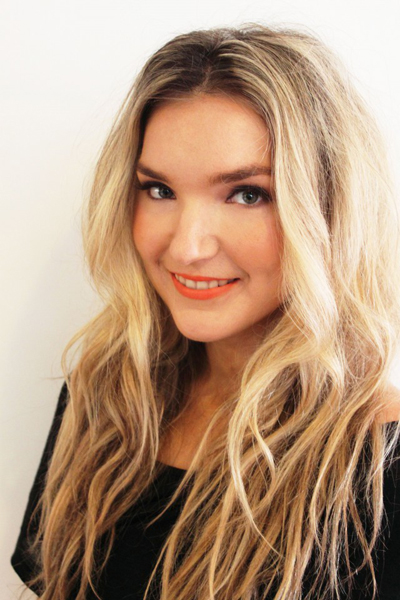
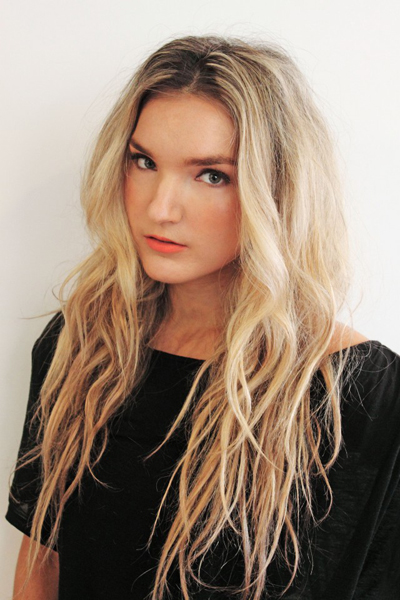
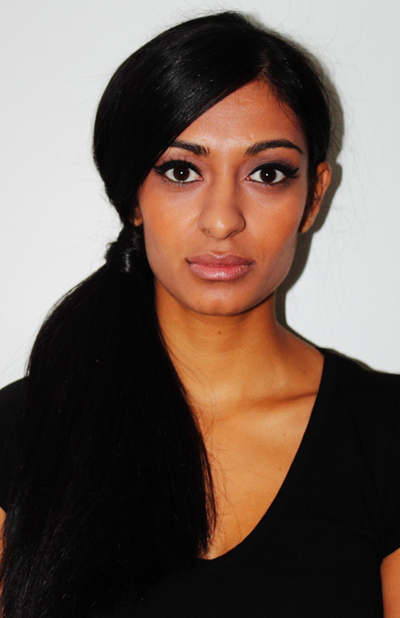
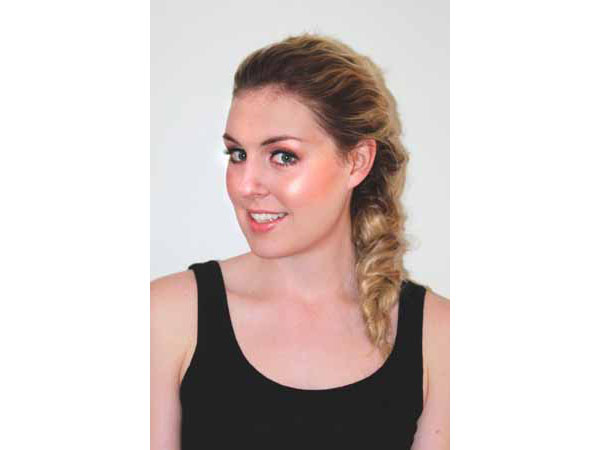
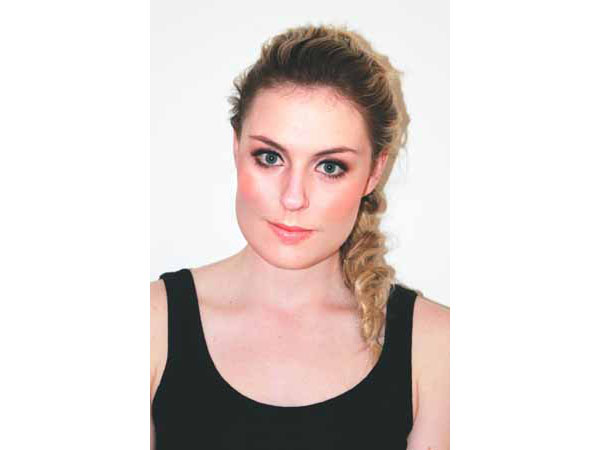
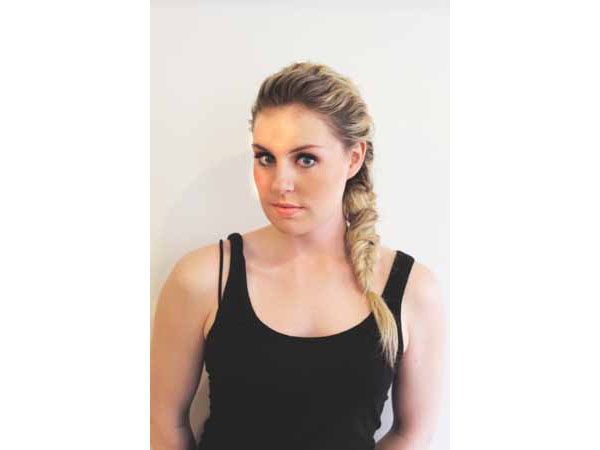
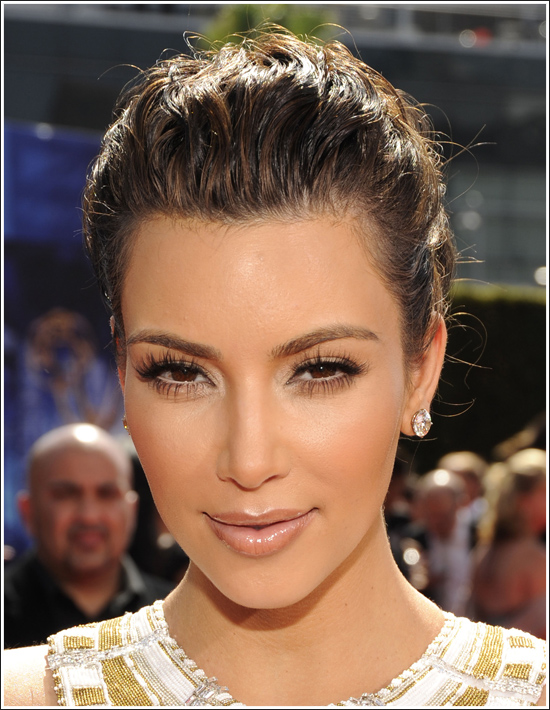
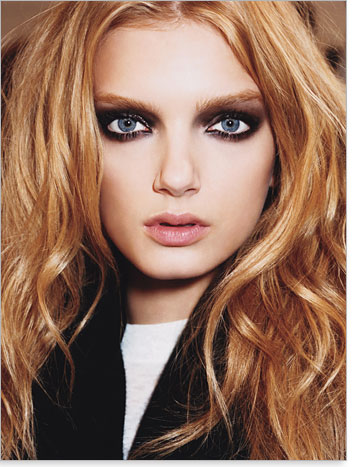
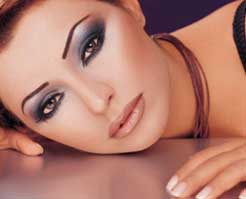
For the final installment of our beauty trend feature in collaboration with the Pointy Toe Shoe Crew, we bring you “Tangerine & Tousled Waves.” This vivacious shade of orange is the hottest color of the summer and can be seen on runways everywhere. To show you how versatile a bold color actually can be, we will be using it on the lips, eyes and cheek for a monochromatic look.
1) Just as how we have be prepping our skin for the previous tutorials, we’ll be cleaning, moisturizing then priming our skin with an all-in-one BB cream
2) Use a peach colored eyeshadow on your eyelids then add a dap of your medium color, taupe or brown in the corners of your creases to add depth
3) Line your upper lash line with black eyeliner and smudge brown eyeshadow along the bottom lash line for a less harsh look.
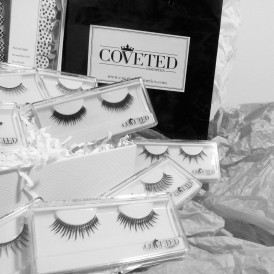
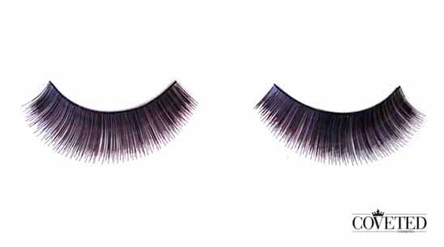
4) Apply a few coats of mascara on the top and bottom lashes and then apply Coveted Cosmetics false eyelashes. If you’re not sure how to apply false eyelashes on yourself, refer to our previous tutorials
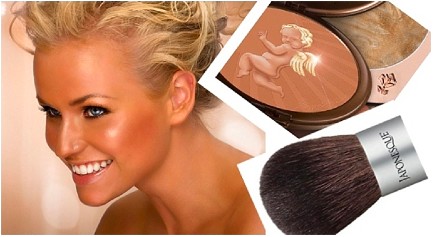
5) Apply a peach colored blush to the apples of your cheeks then contour with bronzer
6) Lastly, apply a tangerine colored lip liner all over the lips and go over with matching lipstick in a matte texture
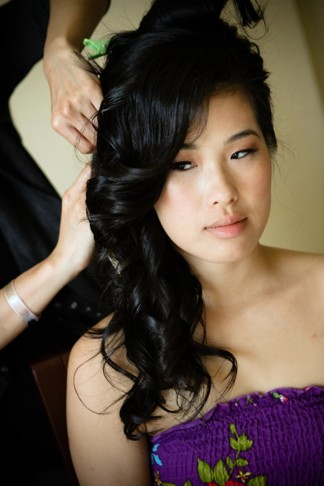
Finally, for that sexy, just-at-the-beach wavy hair look, we’re going to play up the natural texture of your hair. If you have naturally fine and bone straight hair, try some starch spray or beach spray while your hair is damp and put a diffuser on your hair dryer and run it through for a few minutes. If you have naturally wavy hair, simply work some volumizing mousse into it, then let it air dry. If needed to, curl your hair with a curling iron and them loosen up the curls with your fingers. And there you have it! An effortless, sexy beach look completed with you monochromatic tangerine makeup. Special thanks to the Pointy Toe Shoe Crew for collaborating with us. Until next time!
SPRING BEAUTY TRENDS PART 3 : MODERN MEETS RETRO
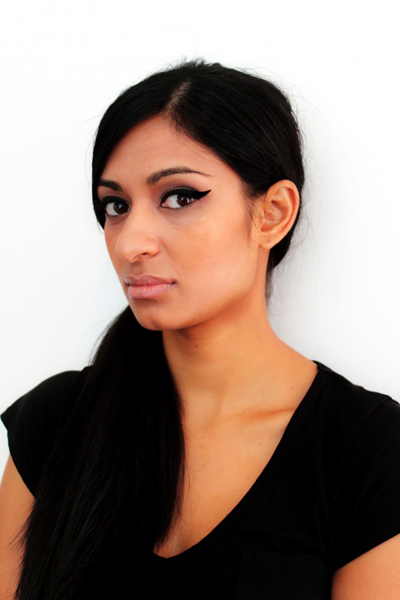
It’s time for another installment of our Spring Beauty Trends Tutorial with the lovely ladies of the Pointy Toe Shoe Crew. Today we are featuring a mod meets retro trend that is easy to wear and works with many different types of looks.
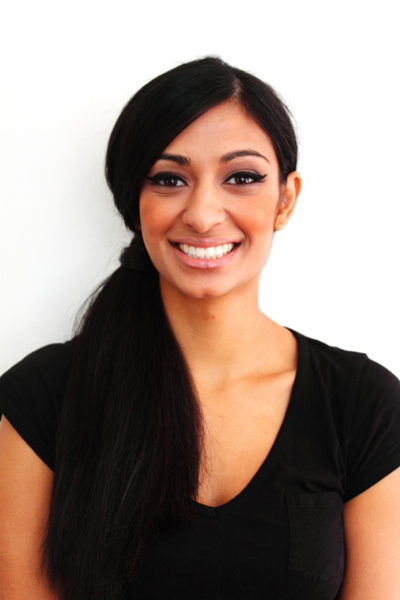
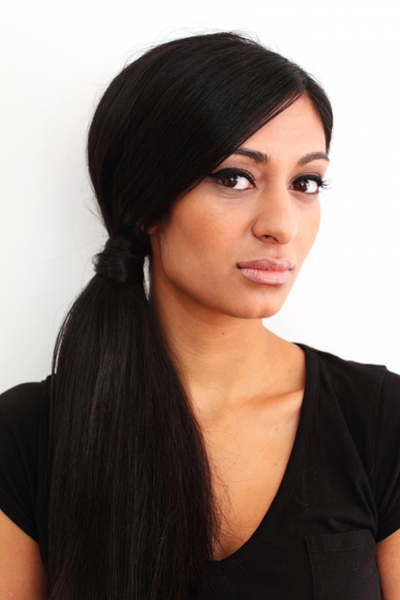
The cat-eyeliner and red lip is the known to be the ultimate classic retro look(think pin-up), but paired with a nude or muted lip can really give this look a contemporary update, which is seen a lot on runways recently paired with a side ponytail. Not only does this look make you look very put-together without trying too hard, but it’s also a nice way to play up with two trends that are usually seen separately.
1) Clean, moisturize, and prime your skin with a primer or a all-in-one BB Cream
2) Apply a cream colour base to your eyelids, then apply your highlight color all over and just beneath your brow bone
3) Add the mid colour to the corners of your outer crease, blending evenly to add depth
4) Fill in your eyebrows with a pencil
5) Not a pro at applying liquid liner? Try tracing the shape with eyeshadow first then going over with black liquid eyeliner
6) Increase the thickness of your cat-eye as you see needed, make sure to take a step back once in a while to assess that the liner for both eyes are symmetrical
7) Apply 1 – 2 coats of mascara, curl, then apply Coveted Cosmetics false eyelashes
8) Contour your cheekbones with bronzer, then apply a peach-toned blush with some shimmer to the apples of your cheeks
9) Keeping with a more contemporary look, line your lips with a nude lip liner and go over with nude pink lipstick and finish off with a matching gloss
For the complimentry side pony tail, tease the hair at the crown and affix with hair spray. Pull your hair to one side and tie a low side ponytail. Take a thin strand of hair, wrap it around the elastic band a few times and secure with a bobby pin. Add some pommade to the ends of the ponytail if they are looking dried.
And there you have it, part retro, part contemporary look that is 100% sexy. Wear this look out with an evening dress for a subdued look or at the office for a slightly polished look. Stay tuned to the final part of our tutorial with Pointy Toe Shoe Crew!
Spring Beauty Trends Tutorial Part 2: ‘Barely There’ Makeup + Messy Braid
Edited from pointytoeshowcrew.com
Coveted Cosmetics recently had the wonderful opportunity to team up with the fab ladies from the popular fashion blog team Pointy Toe Shoe Crew for a Spring Beauty Trend Tutorial series! Check out Part 2 of the series – (Almost) All-Natural Makeup + Messy Braid:
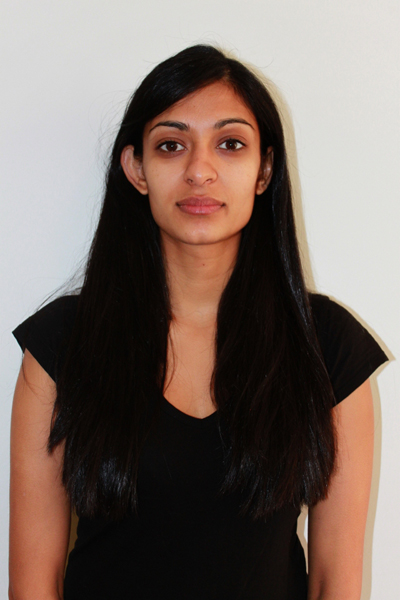
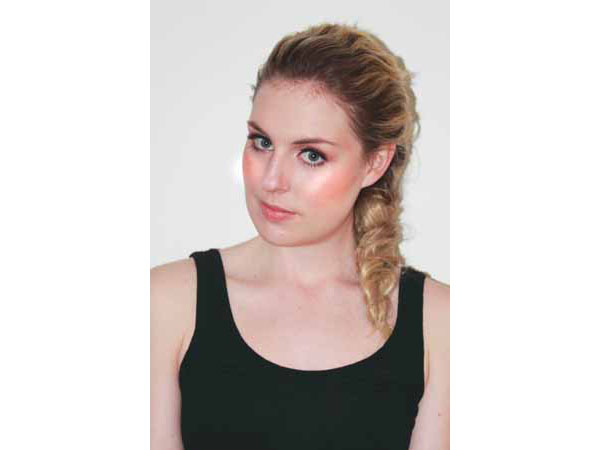
Seen on many popular Spring/Summer runways this year, the ‘Barely There’ look actually requires a lot more makeup than you’d think. The key to this look is the flawless skin and bronzey glow that so many of us sought after. To complete this no-fuss look, add a messy braid to compliment your makeup.
1) Prep and prime your skin with moisturizer, primer and your secret weapon – the do-it-all BB Cream.
2) Highlight and contour with bronzer on your highest and lowest points such as cheekbones, temples and jawline.
3) Combine colors such as a pink and peach blush for an amazing cheek color.
4) Use a light beige color as highlight underneath your eyebrow bone then apply a copper-peach shade eye shadow to on the outer corners of your eyelids.
5) Apply a bronzey-brown eye shadow to the creases and outer corner of lids, dab a bit of dark brown eye shadow to emphasize the corners
6) Apply black eyeliner to the top and bottom waterlines of your eyes and add a bit of brown eye shadow and smudge out the bottom lash line with it.
7) Curl lashes, apply mascara and then apply false eyelashes. If you are worried about the false eyelashes falling out , make sure you apply an adequate amount of glue and let it dry properly.
8) Fill your lips in with a nude lip liner, go over with nude-pink lipstick and finish off with nude lip gloss.
For a messy braid, brush your hair back and off to one side. Tease the part where you plan to braid for more volume and start braiding. You can mix different styles such as a fish tail and a traditional braid. Once you have finished braiding and tied the braid, use a tail comb to pull some pieces apart for added messiness.
And there you have it, a ‘barely-there’ makeup look that you can now try for yourself! Stay tuned for the next 2 segments of our Spring Beauty Tutorial!
All images copyright KatelynD.
All hair & makeup by Sandra Chung.
Spring Beauty Trends Tutorial Part 1 : Strong Brows & Side Buns
Spring Beauty Trends Tutorial Part 1 : Strong Brows & Side Buns
Reblogged from Pointytoeshowcrew.com
Coveted Cosmetics recently had the wonderful opportunity to team up with the fab ladies from the popular fashion blog team Pointy Toe Shoe Crew for a Spring Beauty Trend Tutorial series! Check out Part 1 of the series – Strong Brows & Side Buns:
Seen on models at Theyskens’ Theory, Kenzo, Proenza Schouler, Derek Lam (and I could go on…), a nearly-naked eye anchored with a bold brow made a major beauty statement for S/S 2012. It’s a simple way to add some depth to your look without too many products. Paired with a messy bun, it’s a perfect look for a carefree and casual occasion or even a more glam warm-weather event: you won’t have to worry about melting makeup or limp locks with this look!
For the perfect canvas, start with these complexion-prepping steps:
1) Apply a primer, blending evenly over your whole face (try Laura Mercier Foundation Primer).
2) Apply Lioele Beyond Solution bb cream to entire face (available at liliesshop.net; it’s their #2 best-seller!), followed by MakeUp ForEver HD High-Definition foundation.
3) Using concealer, touch up any blemishes or under-eye circles.
4) Using a mixture of dark rose blush (try NARS Dolce Vita) and a peach blush (try MAC Melba), blend colour on the apples of your cheeks and up cheekbones in a V-shape.
5) Use a bronzer to contour cheekbones and your jawline (try MAC Refine Golden bronzer), and finish with a dusting of iridescent powder on your cheekbones (Sandra used MAC Belightful Iridescent powder, or you could try MAC Mineralize Skinfinish in Soft & Gentle).
For the strong-browed look, follow these easy steps:
1) Apply a basic brow pencil in a soft brown colour to make stray hairs stay in place (try Lorac Creamy Brow Pencil in Blonde)
2) Use an eyebrow brush (or a clean mascara wand) to comb out brows, brushing hairs in their natural direction.
3) Use a small brush to fill in brows with brown and grey eyeshadows, such as bareMinerals READY Eyeshadow 2.0 in The Enlightenment.
4) Apply MAC Untitled paint all over eyelids as a base colour, followed by MAC Vanilla eyeshadow all over the lid and under the eyebrows as a highlighter. For added depth, concentrate MAC Satin Taupe eyeshadow at the outer corner of the eyes and blend it inwards.
5) Using a flat, broad shadow brush, smudge a dark brown shadow (like Laura Mercier Coffee Ground eye colour) along top lash line to create a smoky liner look. Do the same along the bottom lash line, and sweep it downward at the outer part of the eye. Clean things up with a taupe eyeliner (like Urban Decay 24/7 Glide-On Eye Pencil in Underground) and a quick sweep of taupe eyeshadow (MAC Satin Taupe will work again nicely!) over the whole eyelid to blend everything together.
6) Curl lashes, apply a couple coats of mascara and apply Coveted Cosmetics False Lashes in Maiden for a natural look. If you’re unsure how to apply false eyelashes on yourself check out these tutorials here
For subtly beautiful lips:
1) Line lips with MAC lipliner in Subculture.
2) Apply MAC lipstick in Brew.
3) Finish with your favourite clear lipgloss!
And there you have it, the first segment of our Spring Beauty Trend Tutorial, stay tuned for the next three segments!
Much love, Madison Blake
All photos copyright KatelynD.
Day and Night Makeup Tutorial
By: Sandra Chung
How to Take Your Makeup from Day to Night Tutorial
As busy professionals, most of us lead hectic lives where we try to create some sort of balance between work and life. In fact, it’s pretty common for many of us to find ourselves attending several social events after our nine-to-five more than a few times a week. My clients always wonder how they can reduce the amount of time they spend in a day getting ready from event to event and the answer is simply by being efficient: a few easy steps can take your look from day to night.
If you plan to attend a slightly more formal event after work but don’t feel like packing a ball gown in your briefcase, simply layer a blazer over a cocktail dress and accessorize with a scarf to create a more professional and conservative look while in the office. You can always pack or leave a pair of dressy heels at your office and bring some statement accessories to complete your evening outfit.
In terms of makeup, there are several directions you can take to glam up your look. If you’re at the office, chances are you are sticking to more neutral tones on your face. Let’s assume that you’re wearing a neutral makeup look during the day and plan on changing your makeup for an after work event. Depending out the outfit, you can choose to emphasize different features of your face:
Day Makeup
Day to Night Makeup
Day to Night Smoky Eye:
Items Needed:
- a cream eye shadow base in a neutral shade
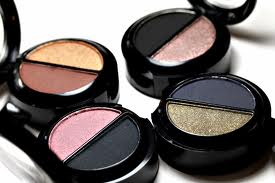
- a darker, neutral eyeshadow palette: black, brown, taupe, beige
- black eyeliner
- Coveted Cosmetics False Eyelashes from the Classic or Dramatic Collection
- bronzer or blush
- nude pink lipliner, lipstick and lip gloss
Day and Night Makeup Instructions:
1. If you don’t want to redo your foundation again, simply blot your face with some blotting sheets and spritz with some Evian water or skin refreshing spray
2. Going over your day makeup, blend the cream eye shadow base over your eyelids evenly
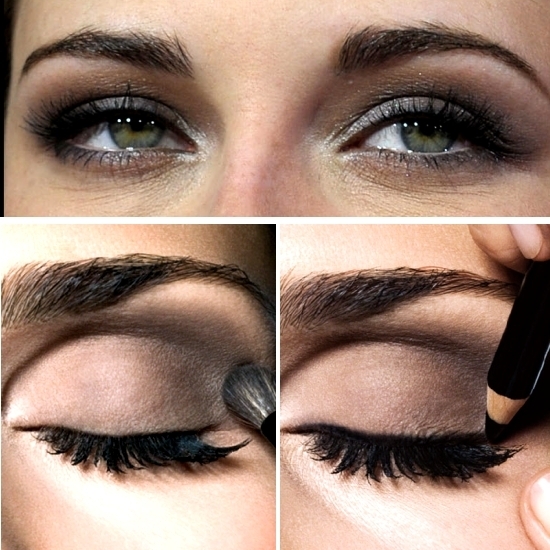
3. Take a fluffly blending brush and blend the taupe eyeshadow over your eyelid area, just below the eyebrow bone
4. Using the same brush, dip a tiny bit of the brown and black eye shadow and smudge it across your top and bottom lash line
5. Dip more of the same color and blend in an outward ‘V’ shape like ‘<’ and ‘>’ at the outermost corner of your eyes until the colors are evenly blended and fade into nothingness
6. Take a new fluffy blending brush and dip the beige or highlight eye shadow color, blending the color evenly just below your eye brows
7. Apply false eyelashes on yourself, you can choose to use either more subtle looking eyelashes or big false eyelashes depending on the look you’re going for
8. Apply black eyeliner on your waterline, and on the top and bottom lash lines. Finish off with mascara if you’d like.
9. Clean up any eye shadow fall out and re-apply concealer under your eyes if necessary
10. Reapply blush and contour with bronzer on the sides of your cheeks as well as jawline. Finish off with nude lip liner, lipstick and gloss.
And there you have it, a simple day-to-night makeover you can whip up at your desk in 10 minutes. Alternatively, you can also choose to play up your lips instead by applying a bold red lipstick or a vampy wine-colored shade to add some drama. Remember to keep some hair spray at your desk and just toss up your hair lightly with some spray to give it some volume. After you’re done with your hair and makeup, simply throw on your dressy heels, put on your statement accessories and you’re ready for an evening out.
What are some of your favorite day to evening makeup tips? Share with me for a chance to win Coveted Cosmetics products! Join me next time for more awesome beauty tips.
Sun-Kissed Wedding Makeup Tutorial
By Sandra Chung
MAKEUP BY SANDRA CHUNG
From the immaculate white gown to the perfect hair and flawless skin, we all know a woman always looks the most beautiful on her wedding day. Being in love will definitely help to give your skin that radiant glow but that’s not the only thing you can do to get that much sought-after look. In today’s tutorial you will learn how to achieve an effortlessly beautiful bridal makeup look in just a few steps.
There are many variations to bridal makeup looks depending on the personality of the bride as well as the theme. Some brides prefer to have a stronger, bolder look while others like to look as natural as possible. It’s a good idea to try different wedding makeup looks prior to your wedding. For this tutorial’s sake you will be learning the iconic sun-kissed makeup bridal look.
Bridal Makeup Preparation
Bridal makeup preparation actually starts several days before as you should go for a facial a few days in advance to ensure that your skin is well exfoliated and properly primed for your big day. Drink plenty of fluids, get a good night’s rest and make sure you’re adequately moisturized before you go to sleep. Proceed to the following instructions the next day:
Items needed for this Wedding Makeup Tutorial
Face:
- face primer
- foundation
- concealer
- a peachy shade blush
- powder bronzer
- cheek highlighter
- translucent powder
- eye brow pencil or powder
PHOTO: dexknows.com
Eyes:
- eye primer
- cream color base for eyes
- Shadows: a beige/ vanilla color with shimmer as base and highlight; a rose or sunset color as your mid color; and a bronzey brown and dark brown for your crease
- false eyelashes and eyelash glue
- mascara(waterproof)
- black liquid or gel eyeliner
Lips:
- lip primer or Vaseline
- lip liner in rose shade
- lipstick in a neutral/ pinkish tone
- lip gloss in similar shade with a tint of gold
PHOTO: bestontop.com
Makeup Instructions
1. Apply primer all over your face with a foundation brush, blend evenly
2. Apply liquid foundation all over your face with a foundation brush, leaving the under eye area out and blending evenly
3. Pencil in your eyebrows with a shade that matches your natural eyebrow color
4. Apply eye primer all over your eyelids with a concealer brush, blend
5. Apply the cream color base over your eyelids and blending in the same manner
6. Apply your beige/ vanilla shade highlight/base color with a fluffy eye shadow brush, blend evenly
7. Dab a bit of the mid color(rose/sunset) and apply it over the area just below your eyebrow bone, covering most of your eyelid from the outer corner to the inner corner, sweeping your brush back and forth
PHOTO: littlepinkbook.co.za
8. Dab a bit of the crease color(bronzey brown) on your small round blending brush and apply if to the upper outer corner of your eye, blending the darkest point in a outward ‘V’ shape, like ‘<’. Move your small round blending brush as if you were tracing the ‘<’ shape and use the larger blending brush and repeat the step until the color is blended evenly into the highlight.
9. Take your large highlighting brush and apply the highlight/base color just below your eyebrow, you can sweep a touch of gold eye shadow just across your eyelid to enhance the sun-kissed effect
10. Curl your lashes with an eyelash curler, apply mascara then apply false eyelashes with eyelash glue. If you are wondering how to apply false eyelashes on yourself there are plenty of resources you can find online. Line your lash line with liquid eyeliner just above where the false eyelashes are placed. Apply mascara to your bottom lashes to your liking.
11. Apply concealer to your under eye area and conceal any blemishes.
12. Apply your blush(peachy/rose color) with a blush brush and blend it evenly on the apples of your cheeks. Apply a highlighter(the shimmery beige/vanilla color eye shadow would do) to the highest point of your cheekbones, giving you a cheeks a healthy glow.
13. Apply bronzer to the high points of your face with a large power brush and contour your cheekbones and jaw line.
PHOTO NORA BOHANON
MAKEUP BY SANDRA CHUNG
14. Line your lips with a rose-colored lip liner, filling your lips in entirely. Go over your lips first with a neutral-pink colored lipstick then with a rose-gold colored lip gloss.
15. Dust translucent powder over your entire face with a large powder brush.
And with just 15 easy steps you’re now ready to strut down the aisle with a beautiful, sun-kissed look! Feel free to share with us your favorite bridal makeup looks. Until next time!
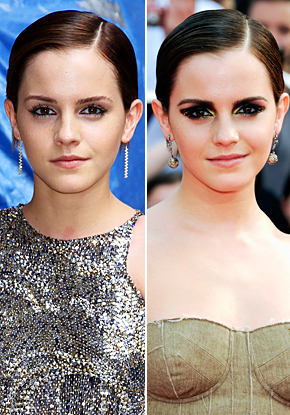
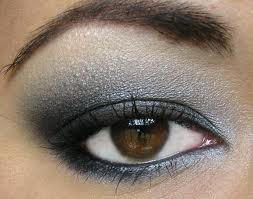
How to do a Sultry Smokey Eye in 10 Steps!
By: Sandra Chung
The smokey eye is one of the most popular and sought-after looks in makeup, often being sported by celebrities on the red carpet as well as models on runways. By making your eyes ‘pop’, this sexy makeup style is popular due to its simplicity and versatility. Whether you’re 19 or 39, there are many different variations of the look that you can wear with endless possibilities.
This look can be done with almost any color, but if you are not familiar with makeup it’s a good idea to stick to a neutral shade at first. A bronzey brown or plum-ish purple are safer choices, but if you are naturally adventurous with your makeup, opting for vibrant shades or different combinations of colors such as turquoise or bright purple can be a lot of fun.
For today’s tutorial, you will learn how to do a standard smokey eye in 10 steps.
Items Needed
- Eye primer
- Cream color base
- Shadows:
1. Neutral base/highlight,
2. Mid color and
3. Dark color ie: beige, bronzey brown and dark brown
- Coveted Cosmetics Vixen false eyelashes http://www.covetedcosmetics.com/false-eyelashes-vixen.html
- Eyelash glue
- Mascara
- Eyelash curler
- Liquid or pencil eyeliner in black
- Under eye concealer
- Brushes:
1. Small flat brush
2. Small round blending brush
3. Larger round blending brush
4. Bigger highlight brush
5. Concealer brush
Once you have gathered your items needed you can get started:
1. Before you apply any makeup on your eyes, apply a eye primer on your lids as it will help prep and moisturize your eyelids for better eye shadow application.
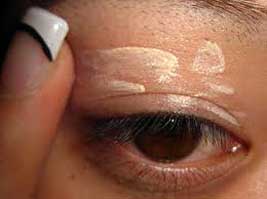
2. Apply a neutral cream color with your small flat brush on your eyelids or some kind of cream base; this will help powder products stay on and blend better, as well as prevent your eye shadow from creasing. Blend evenly in a sweeping motion all across your eyelids from the inner corner to the lash line and up to the highlight.
3. Take same brush and apply your neutral/highlight color(beige) in the same motion as you did with the cream base, going up to the highlight.
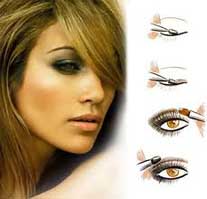
4. Take the same brush and apply your mid color(bronze brown) over the area that is just below your eyebrow bone, covering most of your eyelid from the outer corner to the inner corner, sweeping your brush back and forth. Keep in mid not to dab too much of the product with your brush, if you did you can smear some of the product on to the back of your hand.
5. Take your small round blending brush and and blend the mid color even more in short little strokes moving your brush back and forth. Once you have blended the mid color evenly so that it fades into your highlight area(just below your eyebrow), take the same brush and dab a tiny bit of your darkest color to the upper outer corner of your eye. You can increase the intensity of the look by dabbing more of the darkest color there.
7. Take the same brush and blend the darkest point in an outward ‘V’ shape, like ‘<’ and ‘>’. Move your small round blending brush as if you were tracing the ‘<’ repeatedly. Use the larger blending brush and repeat the step until the color is blended evenly into the highlight.
8. Curl your lashes with an eyelash curler, apply mascara, then apply false eyelashes with eyelash glue.
9. You will notice how your smokey eye is intensified before and after false eyelashes. After your lashes have dried and set, apply either black liquid or pencil eyeliner across your upper lash line covering the band of the fake lashes. You can line your bottom lash line as well, depending on how intense you want your smokey eye to be. Take your small round blending brush and dab some of the mid color and line your bottom lash line with it, the heaviest point at the outermost corner of your eye. Apply mascara to your bottom lashes to your liking.
10. Take your large highlight brush and dab some of your neutral/ highlight color and sweep it across your highlight area below your eyebrows. Your eyeshadow should be an even cascade of colors with the darkest color at the outermost corner of your eyelid, the mid color on your eyelid and the highlight right underneath your eyebrow. Clean any eye shadow fall out with eye makeup remover and apply under eye concealer.
And there you have it, the iconic smokey eye in 10 easy steps. To complete your look, finish off with some nude lip gloss for a contemporary look ,or opt for a luscious red lip for a show-stopping effect.
Welcome to our Beauty Blog!
We will be featuring false eyelashes tutorials, beauty/makeup videos, industry news, gossip and other cool stuff on our blog. We dedicate this blog to our customers as a means to connect and express with all of you our brand’s spirit and values. We hope that the information that we provide will be able to teach, entertain and compel our readers to think. Beauty, cosmetics, makeup, nails and false eyelashes are things that we, as a cosmetics brand have a deep passion for and we hope that our passion can inspire all of you as well.
Beauty bloggers
Our blog will be maintained by Suzanne Christi, Sandra Chung and Karen Li. Suzanne is a professional makeup artist that specializes in wedding makeup. Sandra Chung is a professional makeup artist, Social Media marketer and professional blogger. Sandra most recently did the makeup of our Coveted Cosmetics product photo shoot. Not only did she do an excellent job of applying the makeup, she also organized the whole shoot. She is also a manager for the Vancouver Fashion Week event that has had a tremendous success last year in generating brand awareness and fashion buzz. Karen Li(me), I’m a super awesome girl that loves makeup!
Beauty Blogging Guests
We are open to considering any bloggers that would like to guest write on our blog. The more people sharing their experience and knowledge makes for a more exciting and unique environment. If you are interested in being a guest blogger, please contact us at support@covetedcosmetics.com


